March, 2015
 I had the exhilarating pleasure of hosting a group of three women who previously were unknown to me or each other for a five day Painting Intensive at my place! Such a great time!
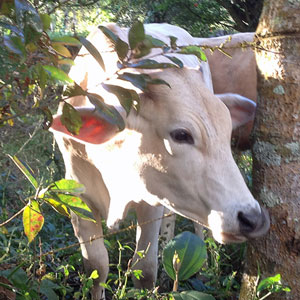
On the third day they wanted to learn how to paint a white object – and we selected a photo of a white Brahmin cow in light. I was delighted and so ready to dive in to this challenge!
My Process
The first thing I did was go to my sketchbook with a photo of the white cow, my prismacolor black pencil and my color wheel! (you can download a free copy of my color wheel from my website here)
* I name the painting first. Naming it Gentle Light will help me focus on what drew me first to this cow, this photo and remind me why I want to paint it! Using my non-graphite Prismacolor black pencil, I do a value/composition sketch – to think through the process and design the painting. I do this fast and loose – not spending more than 10 minutes on it. I note that I want the light to come from the upper left – that is, the light that makes a path through the painting will begin in the upper left and follow the lighted white passages on the cow’s head and body. The value/composition sketch is my roadmap!
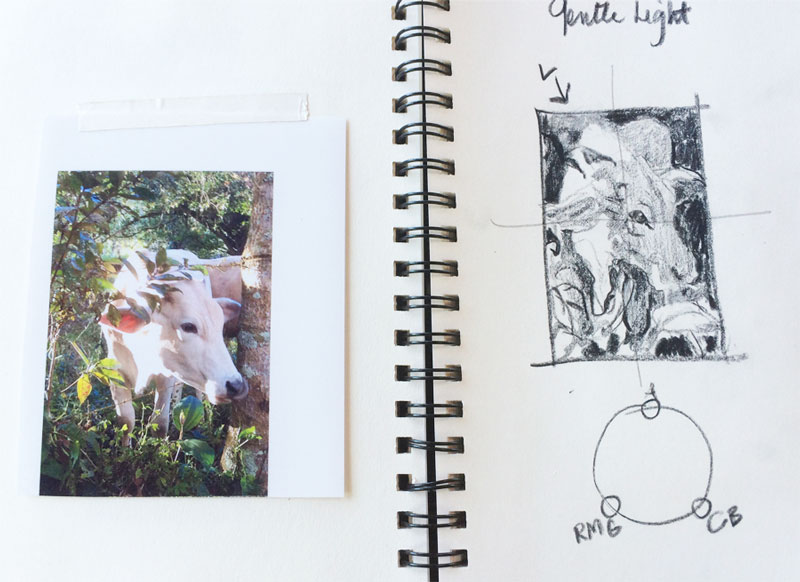
* Next, I choose my paints. Because I am painting a white cow, I decide to use a primary palette of the three primaries in transparent paints – Rose Madder Genuine (magenta), Aureolin Yellow (yellow) and Cobalt Blue (Cyan). These three luminous, non staining pigments can mix with each other and glaze over each other for the glow that watercolor is so perfect at doing!
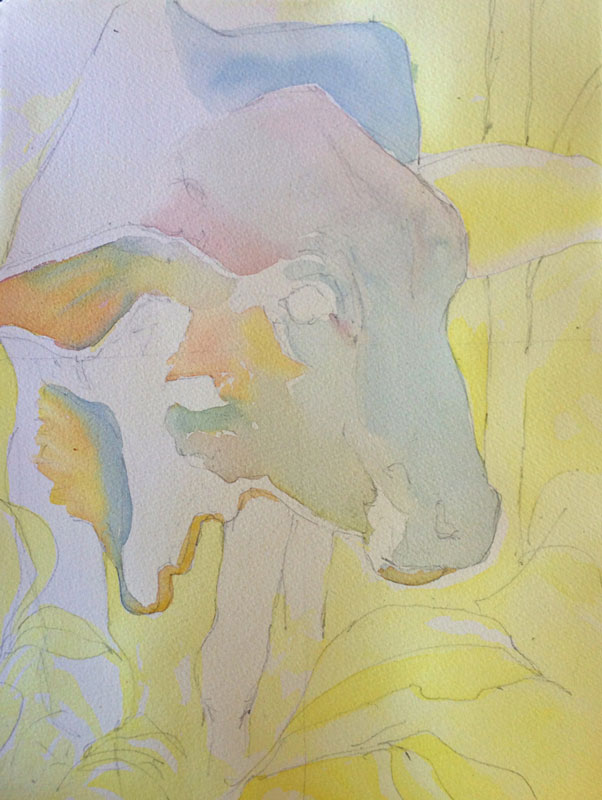
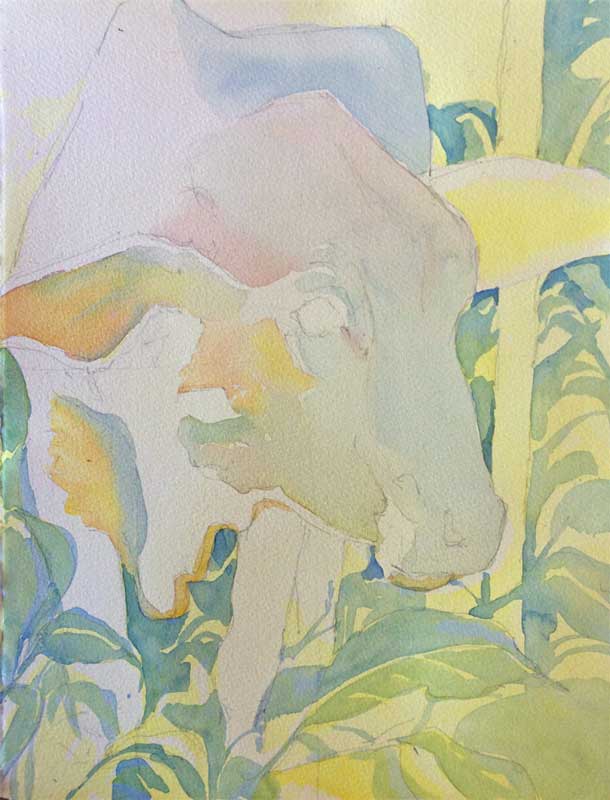
Gentle Light 1
- I begin with an aureolin yellow wash over all parts of the painting except the areas in pure, direct sunlight. Call it painting around the light. Direct light washes out all detail and the beauty of the light is in their intricate shapes. Beginning upper left – I leave the white of the paper and negatively paint (painting around the light) all parts of the painting that are not in direct light. I also left the eye light.
- For the background, I am going to want some of the light in yellow – and also to use the yellow base upon which I can add cobalt blue to make green.
- Any light I even think I see and want to preserve, I leave as the white of the paper.
- When I am painting ‘around the light’ I think of the light as a path and see if there are ways to connect the shapes to each other as I go along.
All of the areas of the cow not in direct light are in shade. The cobalt blue, rose madder genuine and aureolin yellow can be combined and played with to create the beauty of shade when a common temptation seems to be to paint the shade gray. Colors dance in the shade!
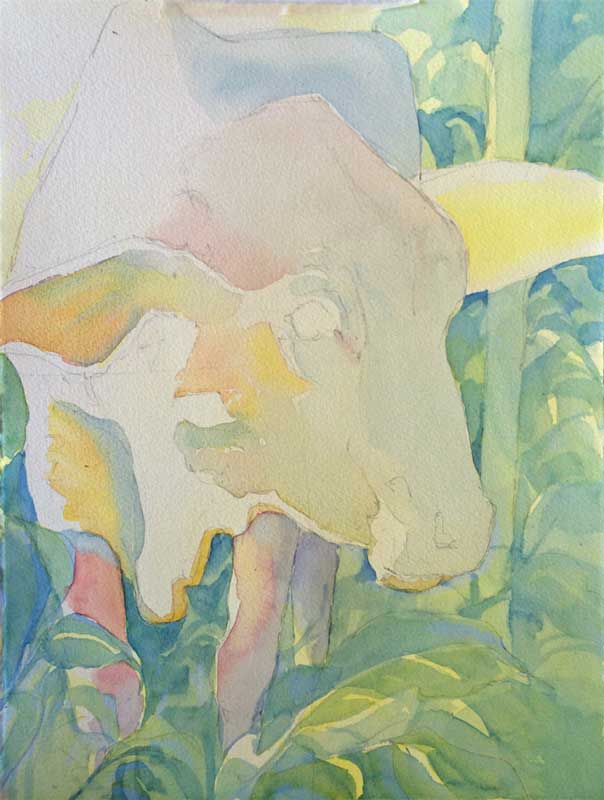
Gentle Light 2
Now I can play a bit in the background using various strengths of cobalt blue. I take care to allow the yellow under wash to play in lots of places – as outlines of leaves or as suggestions of veins in a leaf or as suggestions of stems. I take my time – this is a place to just play and create beautiful shapes. Whenever I’m at a loss for shapes, I simply look carefully at the photo. The shapes are all there!
I really want to emphasize a vertical in the painting – an not necessarily where it was in the photo. I improvised a vertical that es behind the cow’s head – which will help with distance and create a third vertical to the two leg verticals.
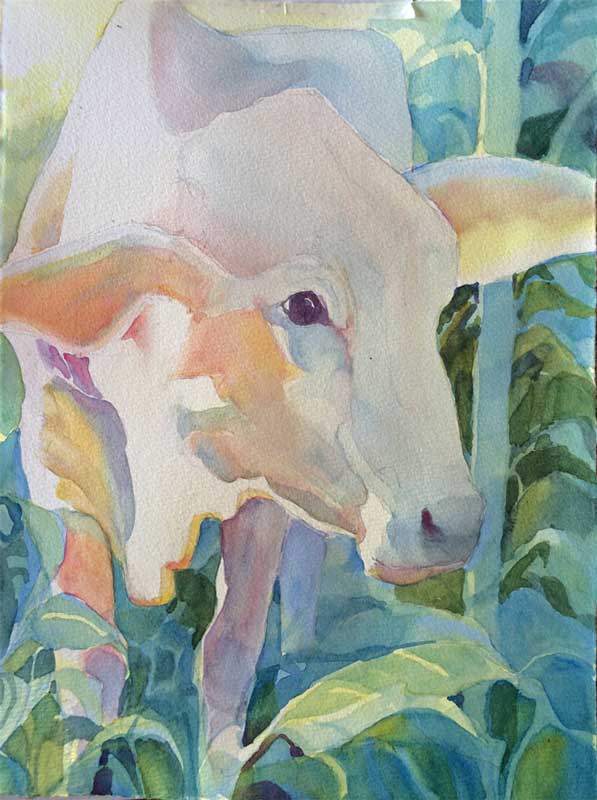
Gentle Light 3
- I take the opportunity for some careful glazing using cobalt blue over the completely dry painting. While I’m glazing, I take care to leave some of the underlying yellow to peak through and offer glimmers of dappled sunlight beyond.
- While I am painting the background, I decide to go into the shaded areas of the legs.
- I still have not painted in the eye or nose details. Why? I know that when I paint the eye, the cow will begin watching me….and I find myself a little subconscious…
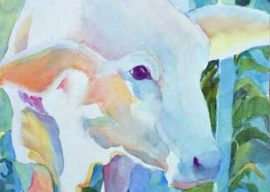
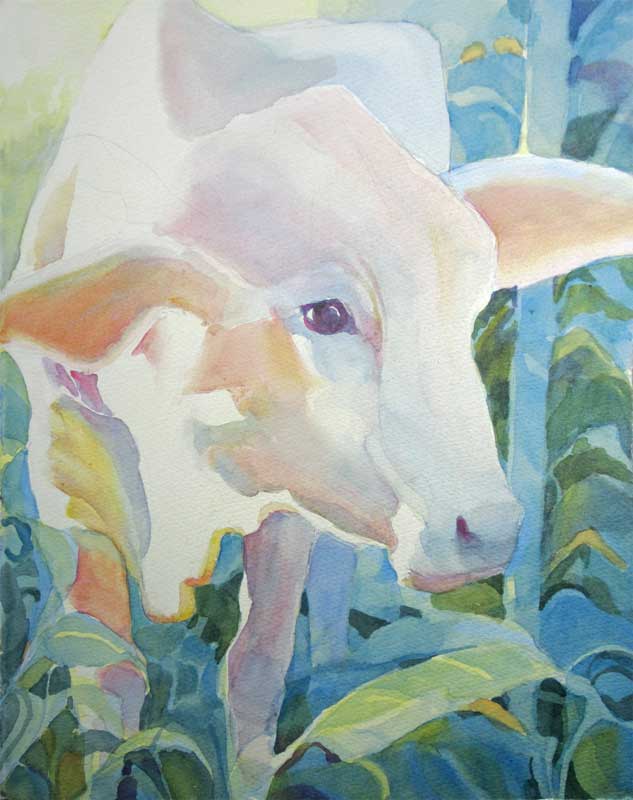
Gentle Light 4
Now I am ready to add in some details and darks!
Gentle Light 4 – the darks! The details! The fun!
Finally it is time to paint in the eyes, the ear that was never touched and the nose.
- At last I can let go of my 3/4″ flat wash brush that I do 90% of my painting with – and use a smaller brush for some of the details work. What fun it is!
- I study the photo carefully before going into the eye or the nose and paint with care.
- In the background I can mix some of the cobalt blue, a little Aureolin and a little Rose Madder Genuine to get the darkest green I can mix using just these paints. I would like to bring some of the dark down from the upper right to the lower left – kind of a ‘trail of dark’ that crosses the ‘trail of light’….
- What fun to do the detail accentuations that I call ‘tucks’ – using the full strength colors. Where one surface joins or meets another, there is a good possibility for a tuck – i.e. the pink tuck just below the right ear. Along with softening some edges, this is the finishing part of the painting that will breathe life into the creation and it isn’t unlikely that it’ll take weeks or even months of casual looking to see where the next finishing detail belongs.
I think there are still a couple of things I have to do to this painting – but it is almost done!
If you would like me to send you a jpeg of the white cow picture so you can paint it – just send me an email here.
Finishing!
May, 2015. It was time to finish and I used the painting time after the Localista Painting Class to do it. Take a look and see that my finishing is subtle and it probably works best to scroll down and compare the ‘before’ and ‘after’. Mostly at this finishing stage, I don’t add anything new. Instead I accentuate or soften what is already there taking care not to add a shape over all the work I’ve done underneath. I’ll comment on some finishing touches as I scroll top to bottom.
- Upper right. I glazed over with cobalt blue to accentuate it and took the fun opportunity to add in some yellow, just for fun and dessert!
- The cow. Mostly I accentuated colors that were already working – especially around the eye. I softened some edges (cobalt blue below the eye), adjusted the eye a bit with dark, smoothed and ‘reddened’ the lower lip….
- Background leaves and shapes. Here is where I spent most of my finishing time by ‘connecting’ some dark shapes to create an illusion of depth and by creating a ‘trail of yellow’ to help guide the eye around the painting. Look for the very subtle dark darks, again to help move the eye and create carefully considered adjacent contrasts.
I would love to hear from you about what you think of the finish! Email me, jan@janhart.com
